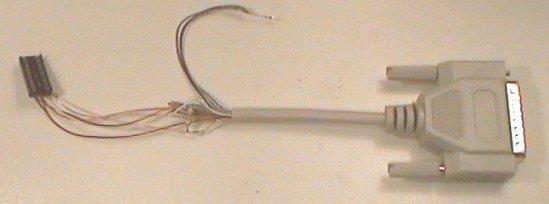
CheapTag Cable
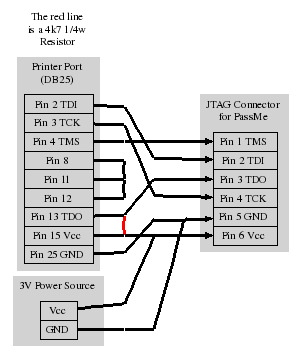
Note that we use a different orientation for the header!!
CheapTag Cable
Jump down to wiring the header if you are following the instructions on the URL above.
So take your parallel cable and cut it down to about 8 - 10 inches long from the DB25 connector that will connect to your parallel port. Now, strip about 5 inches of the main insulator away. Strip the end of each wire and grab your multimeter again. Put one lead onto a wire and drag the other lead along the DB25 connector till you find it.
Now, strip a little section away toward the DB25 connector on the wires of pin 13 and 15. Now tin the wires by applying solder to the wires. Cut down the leads on the 4.7k resistor and solder it between those pins. Now, strip back wires 8, 11, and 12, and wrap them together and solder them. Cover with tape if it makes you feel better.
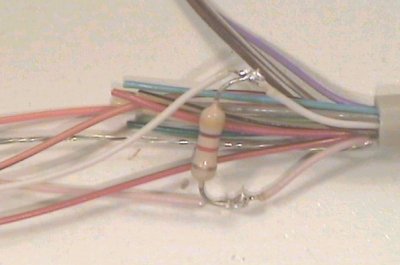
CheapTag Resistor
Now, for the header wiring:
Now all of the parts are ready, so it's tome to Programming the CPLD
 1.3.9.1